Notifications: Settings
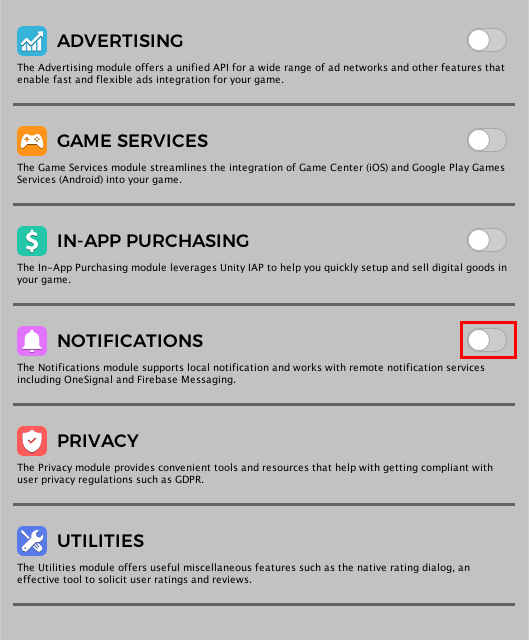
To use the Notifications module you must first enable it. Go to Window > Easy Mobile > Settings, select the Notifications tab, then click the right-hand side toggle to enable and start configuring the module.
Auto Initialization
Auto initialization is a feature of the Notifications module that initializes the service automatically when the module starts. You can configure this feature in the AUTO-INIT CONFIG section.
On iOS, a popup will appear during the first initialization following the app installation to ask for the user's permission to enable notifications for your game.

Auto Init: uncheck this option to disable the auto initialization feature, you can start the initialization manually from script (see Scripting)
Auto Init Delay: how long after the module start that the initialization should take place
"Module start" refers to the moment the Start method of the module's associated MonoBehavior (attached to the EasyMobile prefab) runs. Practically, this is the moment the Easy Mobile runtime is initialized (see Using Easy Mobile > Initializating).
Remote Notification Setup
Enable Remote Notifications
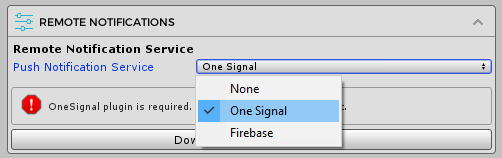
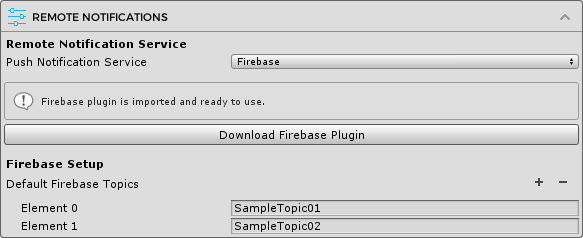
To enable remote/push notifications for your app, select a valid service provider from the Push Notification Service dropdown in REMOTE NOTIFICATION SETUP section. Currently OneSignal and Firebase Cloud Messaging services are supported.
Setup OneSignal
Before You Begin
Before setting up OneSignal in Unity, you must first generate appropriate credentials for your targeted platforms. If you're not familiar with the process, please follow the guides listed here. You should also follow the instructions included in that document on performing necessary setup when building for each platform.
Importing OneSignal Plugin
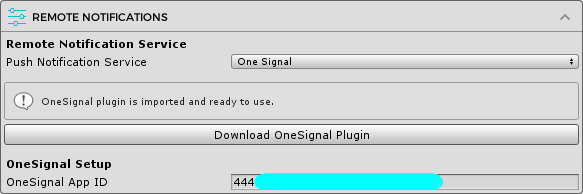
Using OneSignal service requires the OneSignal plugin for Unity. Easy Mobile will automatically check for the availability of the plugin and prompt you to import it if needed. You can click the Download OneSignal Plugin button to open the download page for the plugin. Once it is imported into Unity the settings interface will be updated and ready for you to start configuring.
In fact all you need to do is enter your OneSignal App Id.
Customizing Notification Sounds and Icons
Here're the guides on customization OneSignal notification sounds and Android notification icons:
Setup Firebase Cloud Messaging
Before You Begin
Before setting up Firebase Cloud Messaging in Unity, you will need to create a project in Firebase console. If you're not familiar with the process, please follow this guide.
Note that for iOS you need to associate your project with an APNs certificate:
- Inside your project in the Firebase console open Project Settings then select the Cloud Messaging tab
- Select the Upload Certificate button to upload your development or production certificate, or both. For each certificate, select the .p12 file and provide password if any. Make sure the bundle ID for this certificate matches the bundle ID of your app
- Save
After setting up the project, download the GoogleService-Info.plist file (iOS) or Google-Services.json file (Android) from the console and drag it into your Unity project (you can place these files anywhere under the Assets folder of your project).
Importing Firebase Messaging plugin
Using Firebase service requires the Firebase plugin for Unity. Easy Mobile will automatically check for the availability of the plugin and prompt you to import it if needed. You can click the Download Firebase Plugin button to download the Firebase Unity SDK. After the downloading finishes, unzip the downloaded file and import the FirebaseMessaging package into your project. Once it is imported into Unity the settings interface will be updated and ready for you to start configuring.
Registering Default Notification Topics
Firebase Cloud Messaging has a concept of topic messaging, which allows you to send a message to multiple devices that have opted into a particular topic. If you want to have some default topics that every instance of your app subscribes to when it's installed, you can register them in the settings interface. At the Firebase Topics field click the "+" button and enter all the default topics that you want.
You can learn more about Firebase topic messaging here.
Sending Notifications to Your App
Firebase provides 3 ways to send notifications to your app:
- Using the notification composer in the Firebase Console - learn more here
- Using the Admin SDK
- Using HTTP and XMPP Protocols
Customizing Notification Sounds and Icons
Currently the Firebase notification composer doesn't allow customizing the notification sound and icon (you can only toggle sound on or off). On iOS, the app icon will be used as the notification icon. On Android, you can setup a default notification icon for Firebase by adding the following lines between the <application> element of the AndroidManifest.xml file at the Assets/notifications/Plugins/Android folder.
<meta-data
        android:name="com.google.firebase.messaging.default_notification_icon"
        android:resource="@drawable/firebase_notification_icon" />
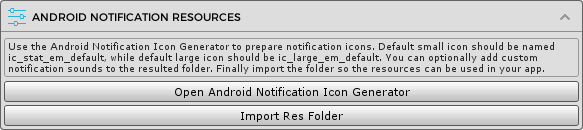
Then you need to create notification icons at appropriate resolutions (you can use the Android Asset Studio), name them firebase_notification_icon, place them into a res folder and import the folder into your Unity project using the Import Res Folder button under the ANDROID NOTIFICATION RESOURCES section of the settings interface (see chapter Adding Notification Resources). You can also use another name for the icons as long as the name in the AndroidManifest.xml and the name of the icon files are same.
If you're using other methods to send notifications to your app, you can specify the notification icons and sounds in the notification content. Just make sure that the specified icons and sounds are available in your app.
iOS Build Notes
After exporting to Xcode, perform the following steps:
- In the General tab, add the UserNotifications framework into your project if it hasn't been added yet.
- In the Capabilities tab, turn on Push Notifications and Background Modes, then check the Remote Notifications box under Background Modes.
Adding Notification Resources
Android Notification Resources
Android notification resources include notification icons and custom notification sounds.
- Custom notification sounds: if you don't want to use the system's default notification sound, you can provide custom sounds to be played when your notifications are delivered.
- Small notification icons: small icons or status bar icons are required and will be used to represent notifications from your app in the status bar. Starting with Android 5, the system forces small notification icons to be all white when your app targets Android API 21+. If you don't make a correct icon, it will most likely be displayed as the fallback icon (bell) or solid white icon in the status bar.
- Large notification icons: large notifications icons are optional and will show up at different positions on the notification depending on the Android version (see below screenshot). If you do not specify a large icon, the small icon will be used.
![]()
Preparing Android Notification Icons
It's advisable to use the Android Asset Studio to quickly and easily generate small icons with the correct settings. Note that the default small icons must be named ic_stat_em_default so that Easy Mobile can recognize it. Below is an example of a res folder containing the default small icons generated by the Android Asset Studio. Later we will import this folder to Unity so that the icons can be used in your project.
![]()
If you want to have a default large icon, create a 256x256 icon, name it ic_large_em_default and place it in the drawable-xxxhdpi folder of the same res folder generated previously.
![]()
Non-Default Notification Icons
Beside the default icons, you can add more custom icons which can be used when scheduling different types of notifications. Just use the Android Asset Studio to generate small icons, and create large icons at the correct sizes (256x256). Then merge them into the same res folder that contains the default icons, making sure the icons go into their correct subfolders. When scheduling a notification, you can select these custom icons using their names.
Preparing Android Notification Sounds
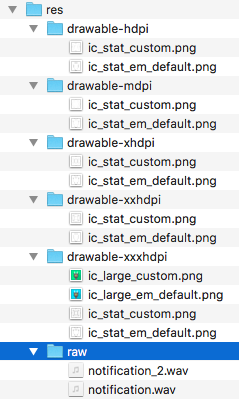
To add custom notification sounds, create a folder named raw inside the res folder that contains the default notification icons and place the sound files there. Later these custom sounds can be specified in your project with their names. Below is an example res folder that contains default icons, custom icons and custom sounds for Android notifications.
Importing Android Notification Resources
After constructing the res folder with all the required icons and sounds, the next step is import the folder into your Unity project so the resources can be used in your app. In the ANDROID NOTIFICATION RESOURCES section, click the Import Res Folder button, then select the generated res folder to import. That's it!
iOS Notification Resources
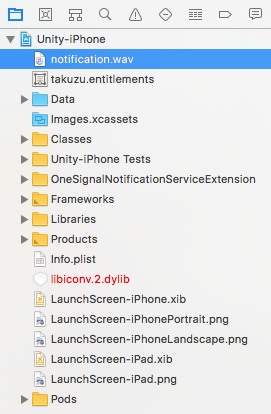
On iOS, notification icons are provided by the system, but you can still have custom notification sounds. To add a custom sound to your iOS app, simply place the sound file anywhere in your Unity project, build your project for iOS platform, and then drag the sound file to the Xcode project root (remember to select Copy items if needed on the Xcode import dialog).
Notes on Notification Sounds
It's recommended to have notification sounds in .wav format so that they can be used on both Android and iOS.
Make sure sound names are consistent across iOS and Android.
Notification sounds must be less than 30 seconds to make sure they can be played on both Android and iOS.
Category Management
Notification Category Groups
In the CATEGORY GROUPS section you can add, edit or remove groups for the notification categories in your app.
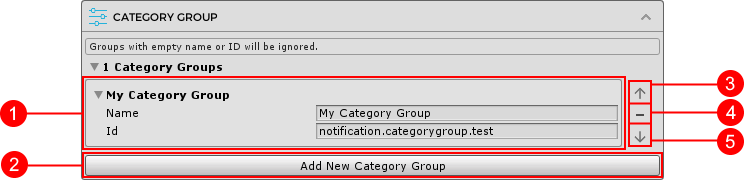
- Group content: where you fill in group information
- Add button: use this button to add a new group
- Move up button: move the group up, for arrangement purpose
- Delete button: use this button to remove the current group
- Move down button: move the group down, for arrangement purpose
A category group content includes following fields:
- Name: the group name, must not be empty
- Id: the group ID, must not be empty; a category specifies the group it belongs to using this ID
Notification Categories
You can manage the notification categories in your app within the CATEGORIES section.
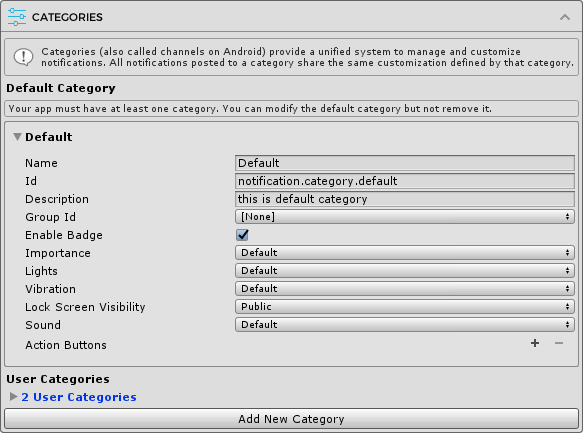
A category content includes following fields:
- Name: category name, only visible on Android devices, this is required
- Id: category ID, this is required; a notification specifies the category it belongs to using this ID
- Description: optional category description, only visible on Android devices
- Group Id: the identifier of the group this category belongs to
- Enable Badge: [Android only] whether the notifications of this category can appear as badges in a Launcher application
- Importance: [Android only] how much interruptive - visually and audibly - the notifications of this category should be
- Lights: [Android only] determines how the notification light should be displayed, on devices that support this feature
- Light Color: [Android only] the color of the notification light, only configurable when Lights is set to Custom
- Vibration: [Android only] determines how the device should vibrate when a notification arrives
- Vibration Pattern: [Android] the vibration pattern of the device, only configurable when Vibration is set to Custom
- Lock-screen Visibility: [Android only] determines how notifications should be displayed on lock-screen
- Sound: determine whether the default sound, or a custom sound, or no sound at all should be played when a notification arrives
- Sound Name: the filename (with extension) of the custom notification sound, only configurable if Sound is set to Custom
- Action buttons: the custom action buttons to be attached to the notifications of this category, each action button requires the following fields:
- Id: action ID, used to distinguish between actions
- Title: action title, used to display the action button on the notification
Default Category
Your app must have at least one notification category, and Easy Mobile provides a built-in default category. You can customize it in the Default Category sub-section of the CATEGORIES section. You can't remove the default category.
User Categories
Beside the default category, you can add as many more categories as you wish. We call these user categories, and they can be managed in the User Categories sub-section of the CATEGORIES section.
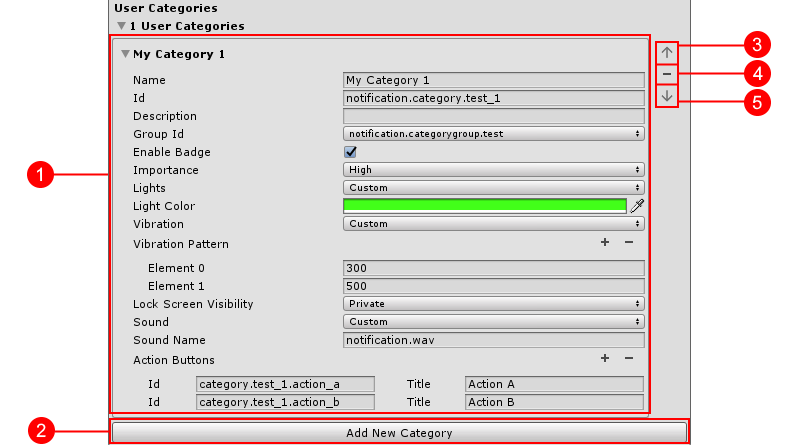
- Category content: where you fill in category information
- Add button: use this button to add a new user category
- Move up button: move the category up, for arrangement purpose
- Delete button: use this button to remove the current user category
- Move down button: move the category down, for arrangement purpose
Constants Generation
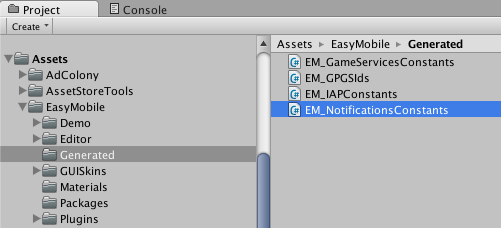
Constants generation is a feature of the Notifications module. It reads the IDs of all user categories added and generates a static class named EM_NotificationsConstants that contains the constants of these IDs. Later, you can use these constants when scheduling a local notification in script instead of typing the IDs directly, thus help prevent runtime errors due to typos and the likes.
To generate the constants class (you should do this after adding all required user categories), click the Generate Constants Class button within the CONSTANTS CLASS GENERATION section.

When the process completes, a file named EM_NotificationsConstants will be created at Assets/notifications/EasyMobile/Generated.