Advertising: Settings | Setup Unity Ads
There are 2 methods to integrate Unity Ads: using Unity Ads Service and using Unity Monetization SDK.
Using Unity Ads Service
To use Unity Ads service, you must first set up your project for Unity Services.
To show ads from Unity Ads you need to enable the corresponding service. Easy Mobile will automatically check for the service's availability and warn you to enable it if needed. Below is the UNITY ADS section when Unity Ads is not enabled.

To enable Unity Ads switch the platform to iOS or Android, then go to Window > Services and select the Ads tab.
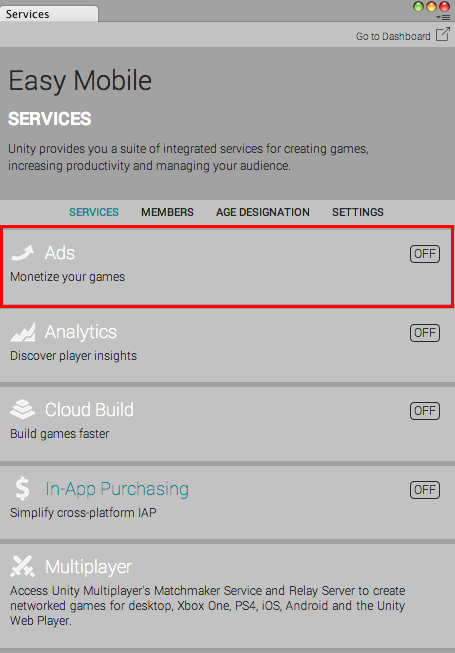
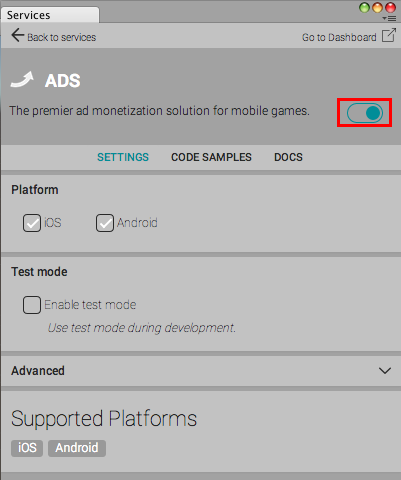
In the opened configuration window, click the toggle at the right-hand side to enable Unity Ads service. You may need to answer a few questions about your game.
Managing Unity Ads Version
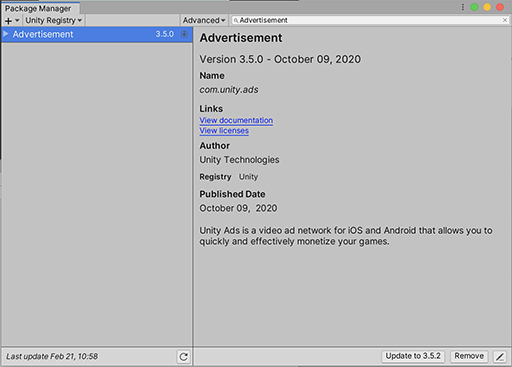
You can manage the Unity Ads version in use via the Unity Package Manager (menu Window > Package Manager). Lookup the Advertisement package and there you can upgrade, downgrade or remove the package entirely if you no longer want to use it in your project (remember to also turn off the Unity Ads service in such case).
Configuring Unity Ads
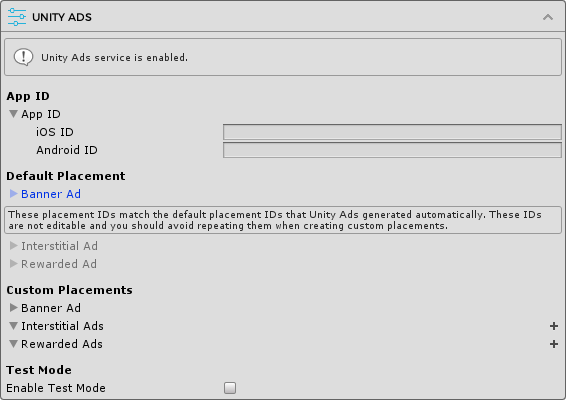
The UNITY ADS section will be updated after the Unity Ads service has been enabled or the Unity Monetization package has been imported.
Using Unity Ads v4
If you are using Unity Ads version 4 or newer in your project, tick the Unity Ads v4 check box. Otherwise, leave it unchecked.
Failure to tick the checkbox after importing Unity Ads v4 will cause compilation errors, so make sure to do this step properly.

App ID
If you're using the Advertisement package (built-in Unity Ads service extension) version older than 3.0.3 you don't need to enter the App ID. This step is only needed if you're using the Unity Monetization SDK or the built-in Advertisement package 3.0.3 or newer.
Go to Unity dashboard, select your project, select the Operate tab, then in the left navigation menu select Monetization > Platforms. The Game ID is the App ID you need to fill in the form.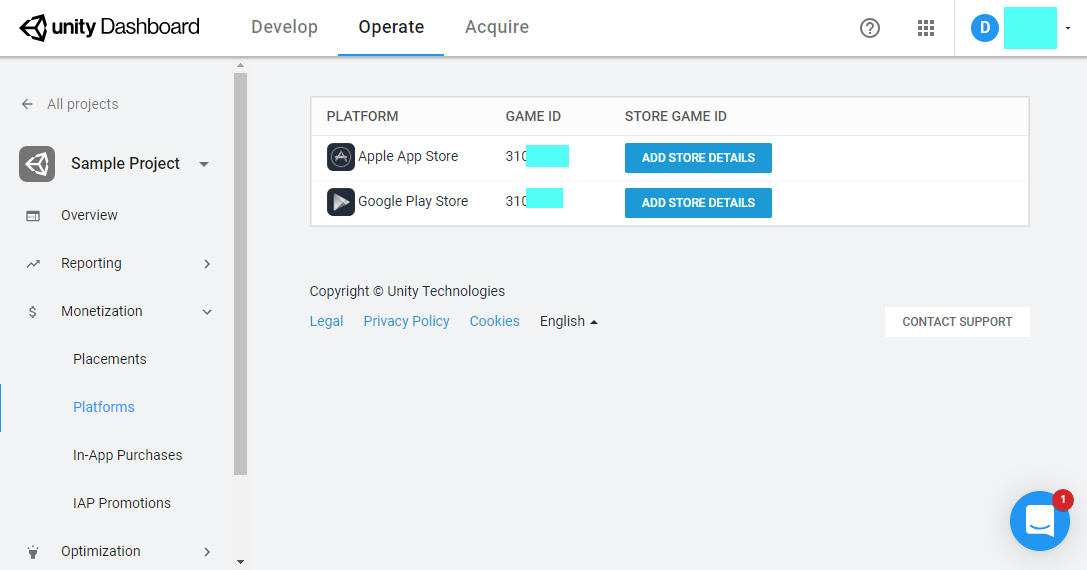
Default Placement
The ad IDs associated with the default placement are prefilled for you automatically. These IDs match the default placement IDs generated by the Unity Ads service when it is enabled and therefore cannot be changed.
Custom Placements
Here you can optionally enter the ad IDs associated with non-default ad placements to be used in your app. You can have an arbitrary number of custom placements and can use built-in placements or create new placements for your needs. Note that you must not reuse the default placement IDs with these custom placements.
Before entering the ad IDs for custom placements in the Custom Placements section, you must create these placements in the Unity Dashboard. In the dashboard select your project, select the Operate tab, then in the left navigation menu select Monetization > Placements and click the ADD PLACEMENT button at the top right corner.
Banner Ads
Banner ads are only available with the Unity Monetization SDK or the built-in Advertisement package 3.0.3 or newer.
The banner ad, unlike interstitial an rewarded ads, is not automatically created by Unity. You need to create the placement manually.
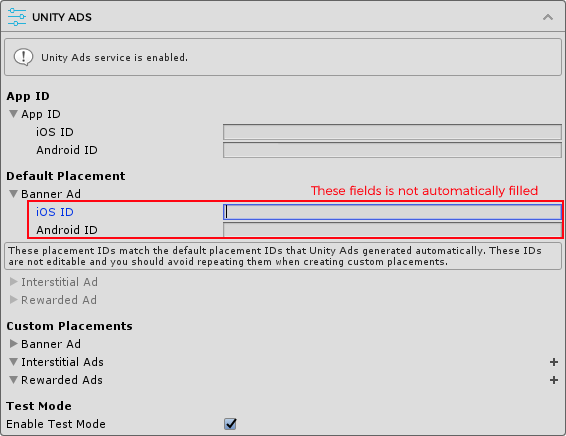
Go to Unity dashboard, select your project, select the Operate tab, then in the left navigation menu select Monetization > Placement and click the Add Placement button at the top right corner. Enter placement id and select placement type is banner.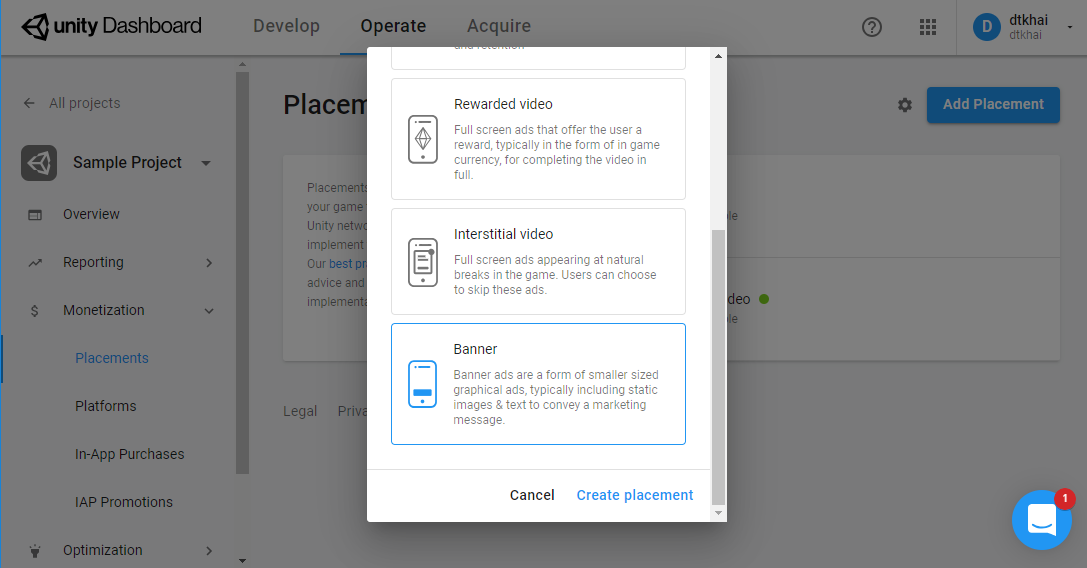
Test Mode
It is advisable to enable Unity Ads test mode during development. This will ensure there's always an ad returned whenever requested and rule out fill-rate issues. If you're using the Unity Monetization SDK or the built-in Advertisement package 3.0.3 or newer, the Enable Test Mode option will appear under the Test Mode section so you can enable it right in Easy Mobile settings. Otherwise go to menu Window > Services and check the similar option in the Ads tab.
Remember to disable this test mode when creating your release build.
