Advertising: Settings | Setup AppLovin
Importing AppLovin Plugin
To show ads from AppLovin you need to import the AppLovin plugin for Unity. In the APP LOVIN section, click the Download AppLovin Plugin button to open the AppLovin page.

In the AppLovin page, you need to signup an account and go to the AppLovin intergration page to download the plugin and import it to your project.
Configuring AppLovin
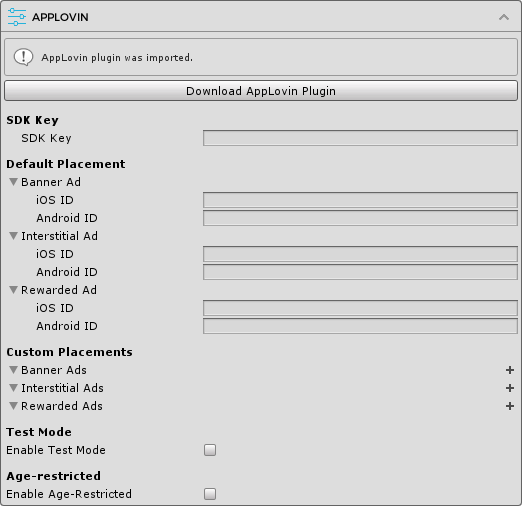
After importing the AppLovin plugin, the APPLOVIN section will be updated as below.

SDK Key
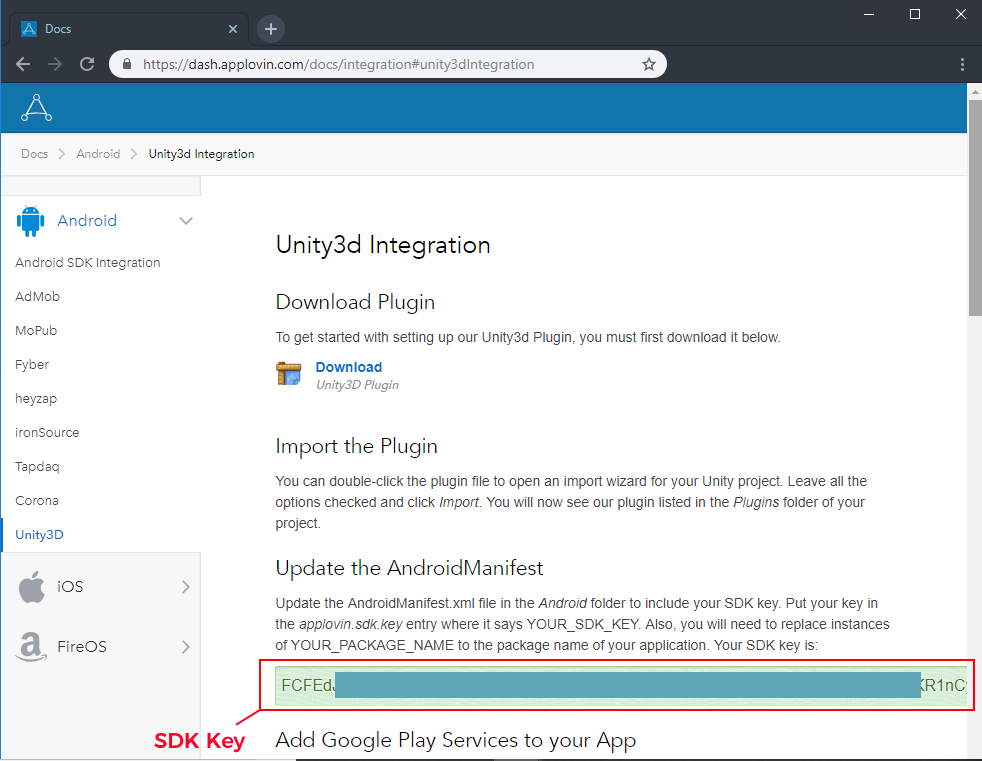
Firstly, you need to enter the required SDK Key that is found in the AppLovin intergration page

Default Placement
Here you can enter the Zone IDs to be used with the default placement for each platform. If you don't use the Zone ID, you can leave the ID sections empty.
You can create Zones for AppLovin in this page here.
Custom Placements
Here you can optionally enter the Zone IDs associated with non-default ad placements to be used in your app. You can have an arbitrary number of custom placements and can use built-in placements or create new placements for your needs.
Test Mode
To enable test mode, simply check the Enable Test Mode option.
Age-Restricted
If your app targets an age-restricted user category (e.g. under the age of 16), you can check the Enable Age-Restricted option.
Building Notes
iOS

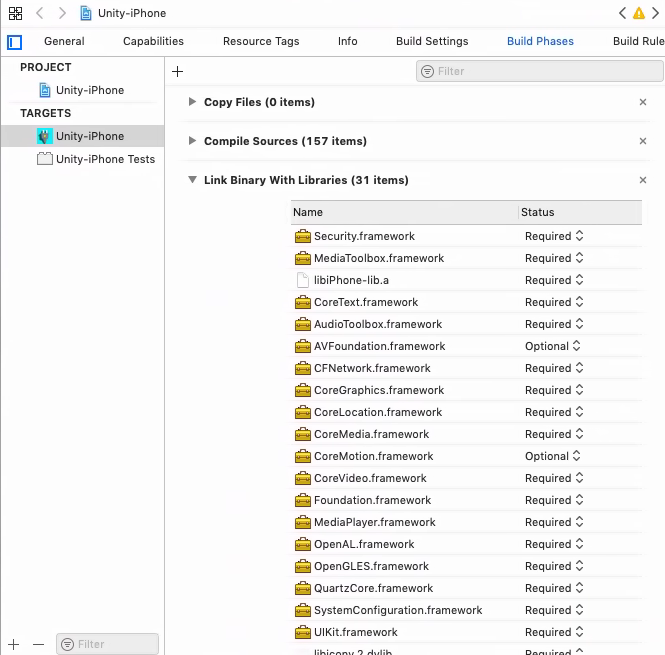
If the error linker command failed with exit code 1 appears after the Unity project is built into an Xcode project, you need to check the presence of the following frameworks in your Xcode project:
- AdSupport
- AVFoundation
- CoreGraphics
- CoreMedia
- CoreTelephony
- SafariServices (NEW)
- StoreKit
- SystemConfiguration
- UIKit
- WebKit (NEW)
- libz.tbd (NEW)
If those frameworks are not in the Link Binary with Libraries section (in Build Phases tab), please add all of them into your project.
Click on your project settings, go to Build Phases.In the Link Binary with Libraries section, click add (+) button and search for the framework.

More information about iOS Unity integration can be found here.