In-App Purchasing: Settings
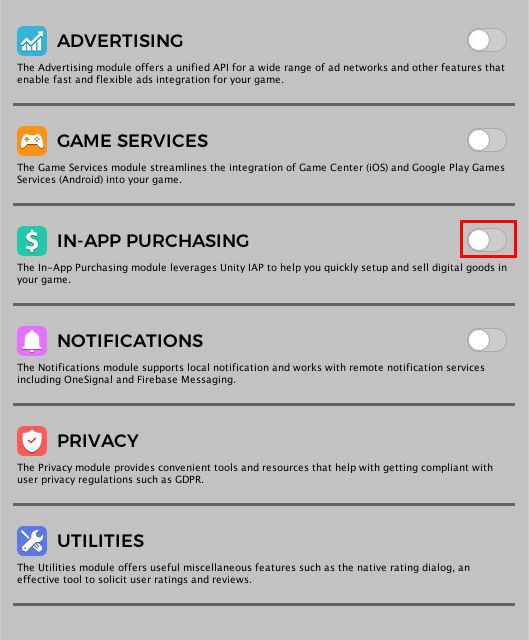
To use the In-App Purchasing module you must first enable it. Go to Window > Easy Mobile > Settings, select the In-App Purchasing tab, then click the right-hand side toggle to enable and start configuring the module.
Enabling Unity IAP
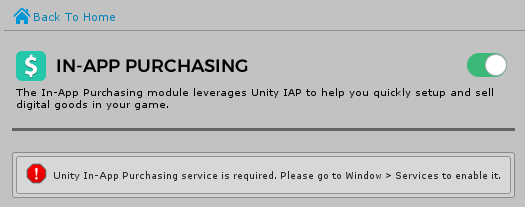
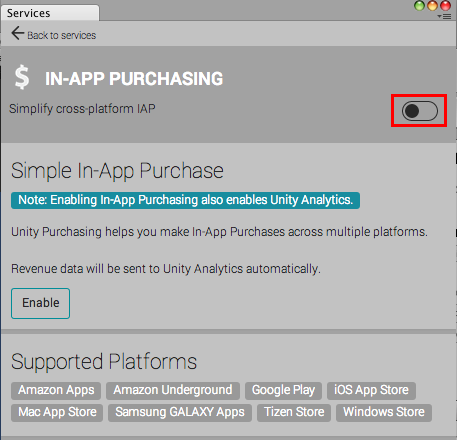
The In-App Purchasing module requires Unity IAP service to be enabled. It will automatically check for the service's availability and prompt you to enable it if needed. Below is the module settings interface when Unity IAP is disabled.
To use Unity In-App Purchasing service, you must first set up your project for Unity Services.
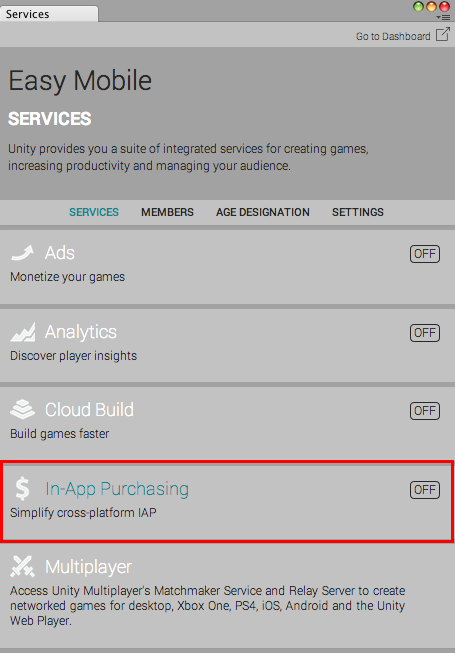
To enable Unity IAP service go to Window > Services and select the In-App Purchasing tab.
In the opened configuration window, click the toggle at the right-hand side or the Enable button to enable Unity IAP service.
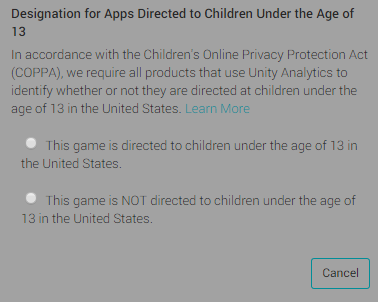
A dialog window will appear asking a few questions about your game in order to ensure COPPA compliance.
Next click the Import button to import the Unity IAP package to your project.
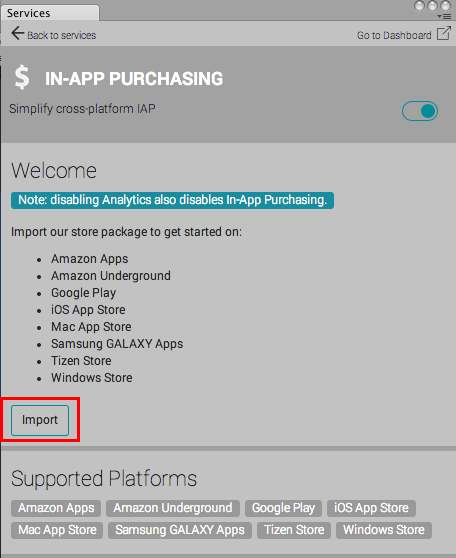
After importing, there should be a UnityPurchasing folder added under Assets/Plugins folder.
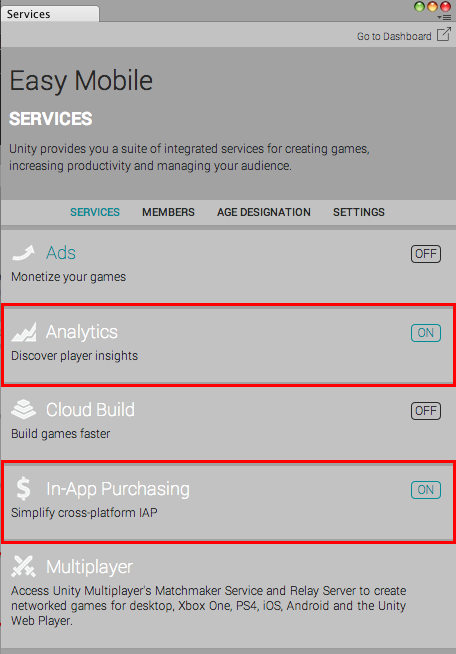
Enabling Unity IAP service will automatically enable the Unity Analytics service (if it's not enabled before), this is a requirement to use Unity IAP. Go back to the Services panel and make sure that both In-App Purchasing and Analytics services are now enabled.
After enabling Unity IAP service, the settings interface of the In-App Purchasing module will be updated and ready for you to start configuring.
Auto Initialization
Auto initialization is a feature of the In-App Purchasing module that initializes the service automatically once the Easy Mobile runtime has been initialized (see Easy Mobile > Initializing). You can toggle this feature in the AUTO INITIALIZATION section, though it is recommended to leave it as checked.

If you disable this option. You must initialize the module manually from script using the InAppPurchasing.InitializePurchasing() method (see Scripting > Initialization).
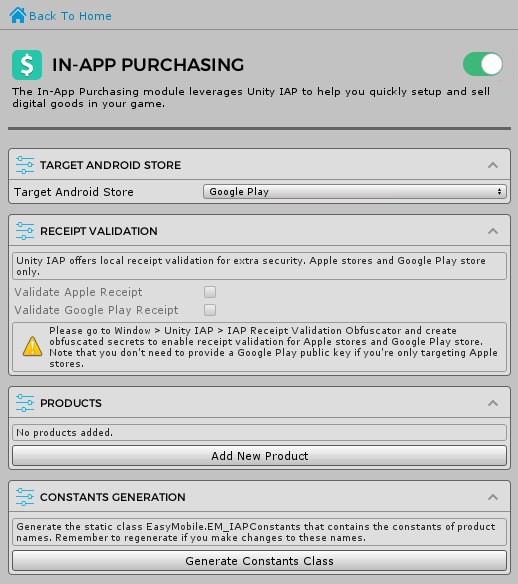
Target Android Store
If you're building for Android platform, you need to specify your target store. In the [ANDROID] TARGET STORE section select your target store from the dropdown.

Apple Ask-To-Buy
Since iOS 8.0, Apple introduces a new parental control feature called Ask To Buy. Basically, Ask To Buy purchases will defer for parental approval. When this occurs, the In-App Purchasing module will notify your app by raising the PurchaseDeferred event, which you can subscribe to perform necessary actions, e.g. updating your UI to reflect the deferred state of the purchases.
In the APPLE ASK-TO-BUY section you can check the Simulate Ask-To-Buy option to enable the simulation of this feature in the sandbox environment, which is useful for testing during development.
This setting has no effect on non-Apple platforms.

Apple Promotional Purchases
Apple allows you to promote in-app purchases through your app’s product page. Unlike conventional in-app purchases, Apple promotional purchases initiate directly from the App Store on iOS and tvOS. The App Store then launches your app to complete the transaction, or prompts the user to download the app if it isn’t installed.

You can instruct the In-App Purchasing module to intercept these promotional purchases by checking the Intercept Promotional Purchases option in the APPLE PROMOTIONAL PURCHASES section. Once a promotional purchase is intercepted, the PromotionalPurchaseIntercepted event will be fired. You can subscribe to this event and in its handler perform necessary actions such as presenting parental gates, sending analytics events, etc. before sending the purchase back to Apple by calling the ContinueApplePromotionalPurchases method, which will initiate any queued-up payments. If you do not enable this option, the promotional purchases will go through immediately with the PurchaseCompleted or PurchaseFailed event being fired according to the purchase result, and the PromotionalPurchaseIntercepted will never be raised.
- The Intercept Promotional Purchases setting has no effect on non-Apple platforms.
- It is vital to call the ContinueApplePromotionalPurchases method in the handler of the PromotionalPurchaseIntercepted event for the purchases to be processed properly after being intercepted.
Receipt Validation
The receipt validation feature provides extra security and helps prevent prevent fraudulent users from accessing content they have not purchased. This feature employs Unity IAP's local receipt validation, which means the validation takes place on the target device, without the need to connect to a remote server.
Receipt validation is available for Apple stores and Google Play store. Please find more information about Unity IAP's receipt validation here.
Obfuscating Encryption Keys
To enable receipt validation, you must first create obfuscated encryption keys. The purpose of this obfuscating process is to prevent a fraudulent user from accessing the actual keys, which are used for the validation process. To obfuscate your encryption keys, go to Window > Unity IAP > Receipt Validation Obfuscator.

In the opened IAP Obfuscator window, paste in your Google Play public key and hit the Obfuscate secrets button. According to Unity documentation, this will obfuscate both Apple's root certificate (bundle with Unity IAP) and the provided Google Play public key and create two C# files AppleTangle and GooglePlayTangle at Assets/Plugins/UnityPurchasing/generated. These files are required for the receipt validation process.
To obtain the Google Play public key for your app, login to your Google Play Developer Console, select your app, then navigate to the Services & APIs section and find your key under the section labeled YOUR LICENSE KEY FOR THIS APPLICATION.
Note that you don't need to provide a Google Play public key if you're only targeting Apple stores.
Enabling Receipt Validation
After creating the obfuscated encryption keys, you can now enable receipt validation for your game. Open the In-App Purchasing module settings, then in the RECEIPT VALIDATION section check the corresponding options for your targeted stores.

Product Management
In the PRODUCTS section you can easily add, edit or remove your IAP products.
Adding a New Product
To add a new product, click the Add New Product button.

A new empty product will be added.
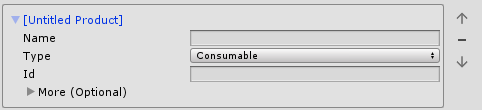
Fill in the required information for your new product:
- Name: the product name, can be used when making purchases
- Type: the product type, can be Consumable, Non-Consumable or Subscription
- Id: the unified product identifier, you should use this ID when declaring the product on your targeted stores; otherwise, if you need to have a different ID for this product on a certain store, add it to the Store-Specific Ids array (see below)
Click More if you need to enter store-specific IDs or fill in optional information for your product.
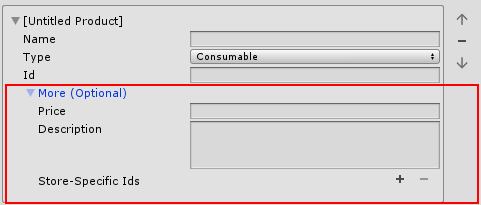
- Price: the product price string for displaying purpose
- Description: the product description for displaying purpose
- Store-Specific Ids: if you need to use a different product ID (than the unified ID provided above) on a certain store, you can add it here
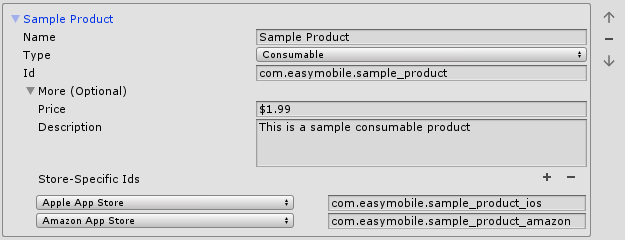
Adding Store-Specific ID
To add a new ID to the Store-Specific Ids array, increase the array size by adjusting the number in the right-hand side box. A new record will be added where you can select the targeted store and enter the corresponding product ID for that store.
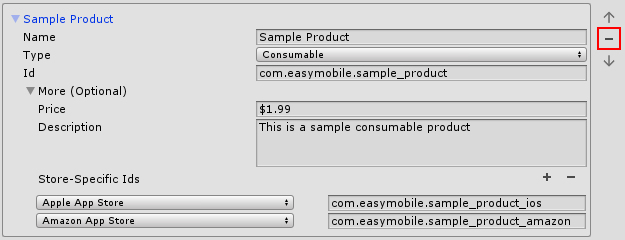
Below is a sample product with all the information entered including the two store-specific IDs.
Removing a Product
To remove a product, simply click the [-] button at the right hand side.
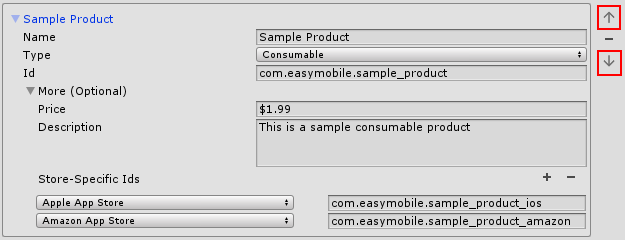
Arranging Product List
You can use the two arrow-up and arrow-down buttons to move a product upward or downward within the product list.
Setup Products for Targeted Stores
Beside creating the product list in Unity, you also need to declare similar products for your targeted stores, e.g. if you're targeting iOS App Store you need to create the products in iTunes Connect. If you're not familiar with the process, you can follow Unity's instructions on configuring IAP for various stores, which also include useful information about IAP testing.
On Google Play store, both consumable and non-consumable products are defined as Managed product. If a product is set to Consumable type in Unity, the module will automatically handle the consumption of the product once it is bought and make it available for purchase again.
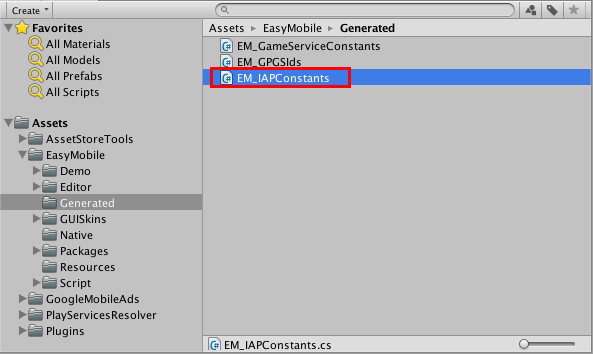
Constants Generation
Constants generation is a feature of the In-App Purchasing module. It reads all the product names and generates a static class named EM_IAPConstants that contains the constants of these names. Later, you can use these constants when making purchases in script instead of typing the product names directly, thus help prevent runtime errors due to typos and the likes.
To generate the constants class (you should do this after finishing with product editing), click the Generate Constants Class button within the CONSTANTS CLASS GENERATION section.

When the process completes, a file named EM_IAPConstants will be created at Assets/EasyMobile/Generated.