GIF: Setup
This section explains the various components, objects and concepts involved in clip recording, clip playing and GIF exporting. It also provides a guide on creating and configuring relevant objects and components.
Recorder Component
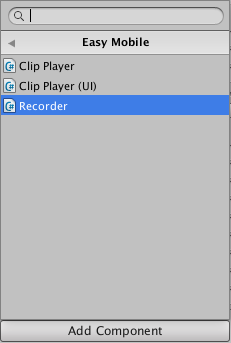
The Recorder component records the content rendered by a camera and returns the recorded clip. To start recording, simply add a Recorder component to the camera that renders the content you're interested in recording (normally this will be the Main Camera). To add the component to a camera, select that camera in the Hierarchy, then click Add Component > Easy Mobile > Recorder.
Once the Recorder component is added to the camera, you can start configuring it in the inspector to determine how the recorded clip (and as a result, the exported GIF) will be like.
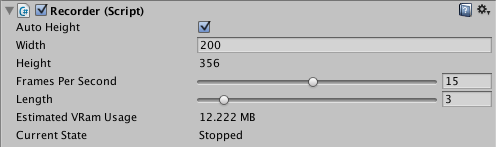
- Auto Height: whether the clip height should be computed automatically from the specified width and the camera's aspect ratio, which is useful to make sure the exported GIF has a correct aspect ratio
- Width: the width of the recorded clip in pixels
- Height: the height of the recorded clip in pixels
- Frames Per Second: the frame rate of the clip
- Length: the clip length in seconds; the recorder automatically discards old content to preserve this length, e.g. if you set this value to 3 seconds, only last 3 seconds of the recording will be stored in the resulted clip, the rest will be discarded
- Estimated VRam Usage: the estimated memory used for recording, calculated based on the above settings
- Current State: the current status of the recorder, which is either Stopped or Recording
Now that the recorder is configured, you can start and stop its recording activity from script (see the Scripting section). Once the recording is stopped, the recorded clip will be returned for playback of GIF exporting.
Recording the UI
To record the UI (Canvas content), you need to set the Canvas Render Mode to World Space or Screen Space - Camera, and set the Render Camera to the one containing the Recorder component in the latter case.
Recording multiple composited cameras
If your scene contains multiple cameras being composited (using Camera.depth and Clear flags), you can add the Recorder component to the top-most camera, so it captures whatever content being composited and shown by that camera.
AnimatedClip Class
Recorded clips are represented by the AnimatedClip class, which has following properties:
- Width: the width of the clip in pixels
- Height: the height of the clip in pixels
- Frame Per Second: the frame rate of the clip
- Length: the length of the clip in seconds
- Frames: an array of frames, each frame is a Render Texture object
Playback
Easy Mobile provides two built-in objects dedicated for playing recorded clips: the Clip Player and Clip Player UI objects. You can create them from the context menu (as you would with other Unity built-in objects), configure them in the inspector, and start or stop their playing activity from script (see the Scripting section).
Clip Player
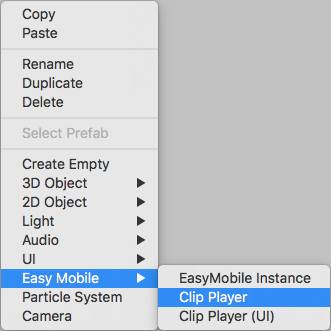
The Clip Player is a non-UI object, which is basically a Quad object equipped with a ClipPlayer component. It is meant to be used inside the game world. To create a Clip Player object, right-click in the Hierarchy window to open the context menu, then select Easy Mobile > Clip Player.
Each Clip Player object contains a ClipPlayer component.

The only parameter of this component is the Scale Mode, which can take one of 3 values:
- None: don't adjust the object sizes
- Auto Height: keeps the current height of the object (the Y component of its localScale), and adjust the width (the X component of its localScale) to match the aspect ratio of the clip being played
- Auto Width: keeps the current width of the object (the X component of its localScale), and adjust the height (the Y component of its localScale) to match the aspect ratio of the clip being played
Clip Player UI
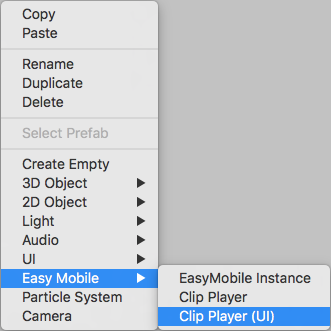
The Clip Player UI, as it name implies, is a UI object living inside a Canvas. It is the object to use when you want to play a clip inside the UI. It is basically a Raw Image object equipped with a ClipPlayerUI component. To create a Clip Player UI object, right-click in the Hierarchy window to open the context menu, then select Easy Mobile > Clip Player (UI).
Each Clip Player UI object contains a ClipPlayerUI component.

The only parameter of this component is the Scale Mode, which can take one of 3 values:
- None: don't adjust the object sizes
- Auto Height: keeps the current height of the object (the Height value in its Rect Transform), and adjust the width (the Width value in its Rect Transform) to match the aspect ratio of the clip being played
- Auto Width: keeps the current width of the object (the Width value in its Rect Transform), and adjust the height (the Height value in its Rect Transform) to match the aspect ratio of the clip being played
Custom Clip Player
Beside the two built-in clip players provided by Easy Mobile, you can construct your own player to serve your specific needs. To make it consistent with other players, and compatible with Easy Mobile API, this player should contain a script implementing the IClipPlayer interface, which is responsible for applying the frames (RenderTextures) of the clip, at the required frame rate, to whatever texture-displaying component it is equipped with.
Universal Render Pipline Setup
When you use Universal Render Pipeline, EasyMobile will rely on the custom render feature EM_GIF Recorder to record your screen. To use GIF record feature with Universal Render Pipeline, you will have to add this custom render feature to your ScriptableRenderData Asset.
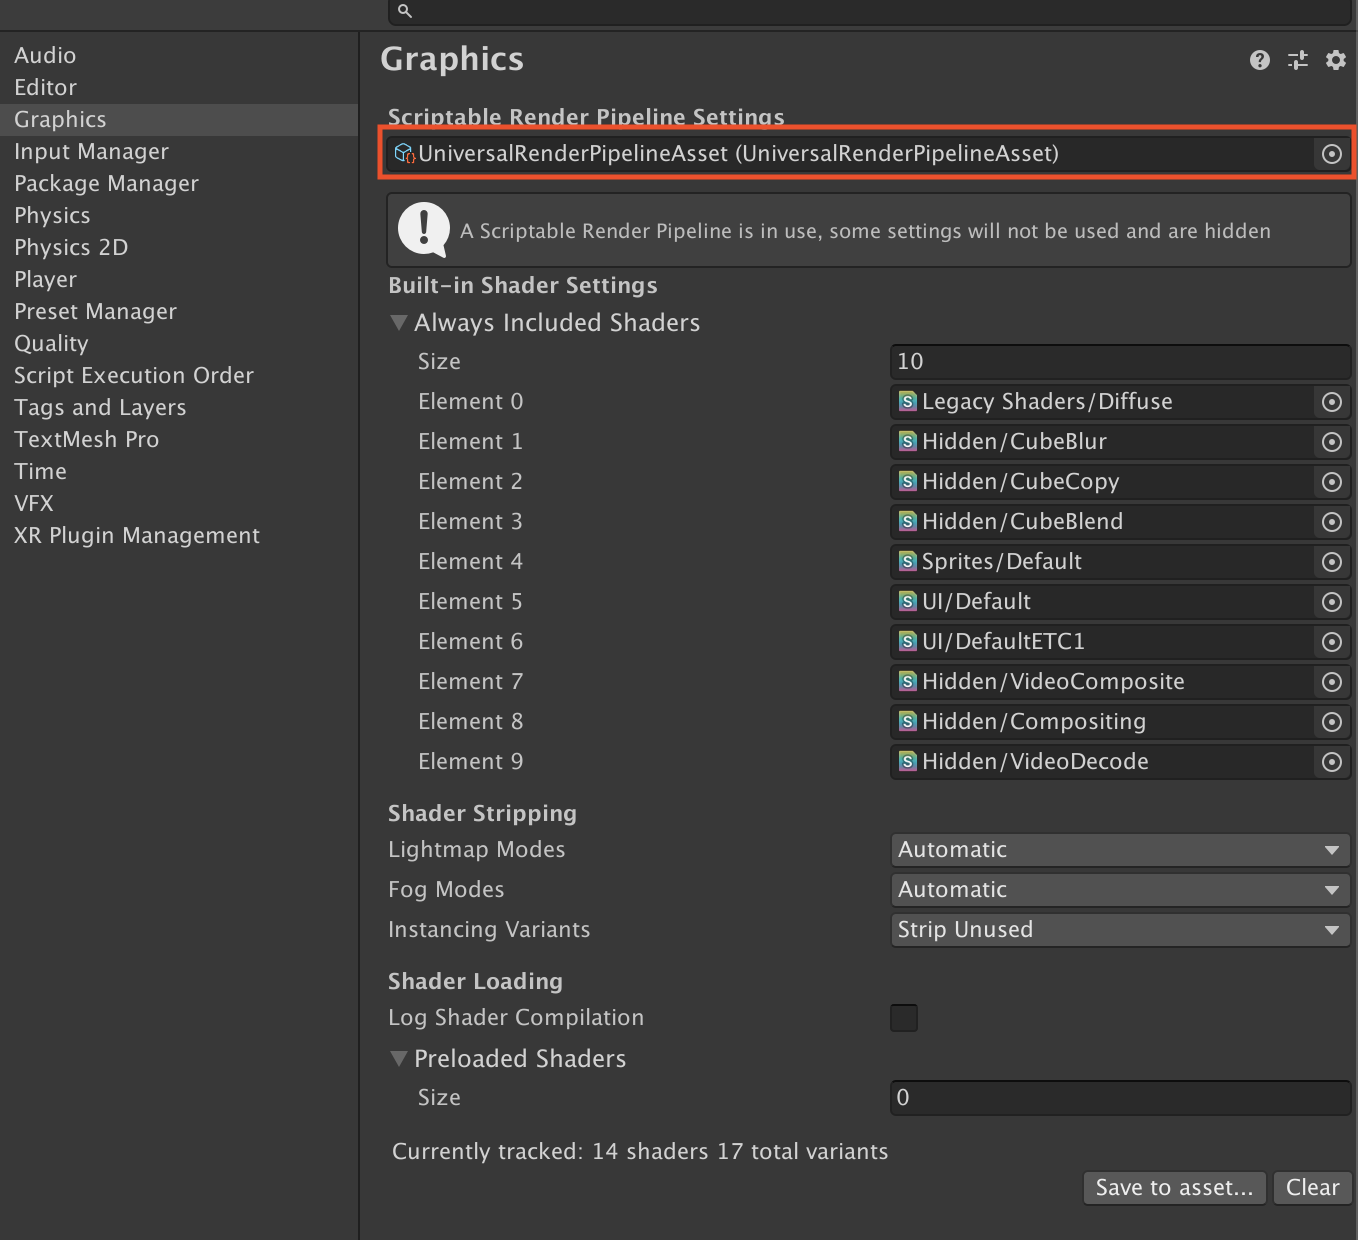
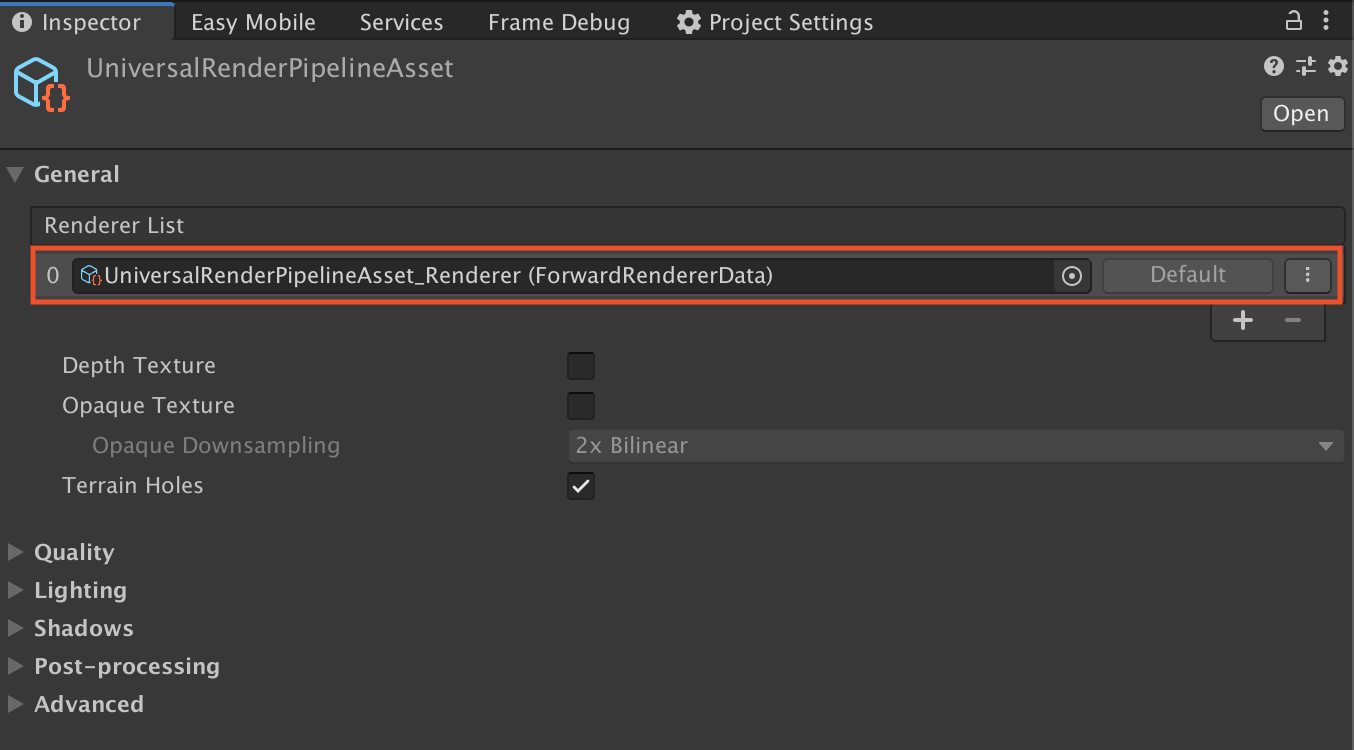
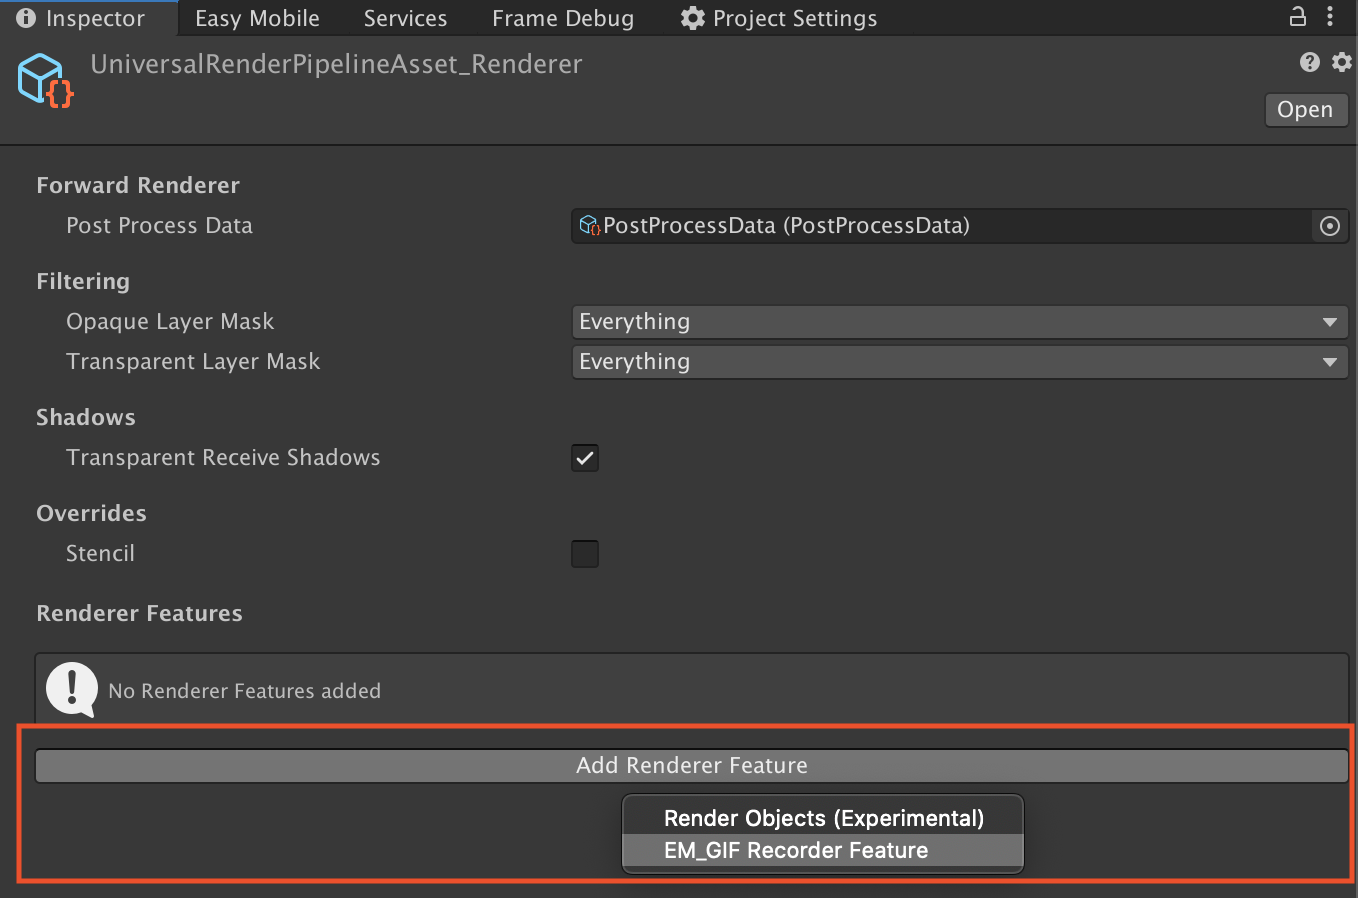
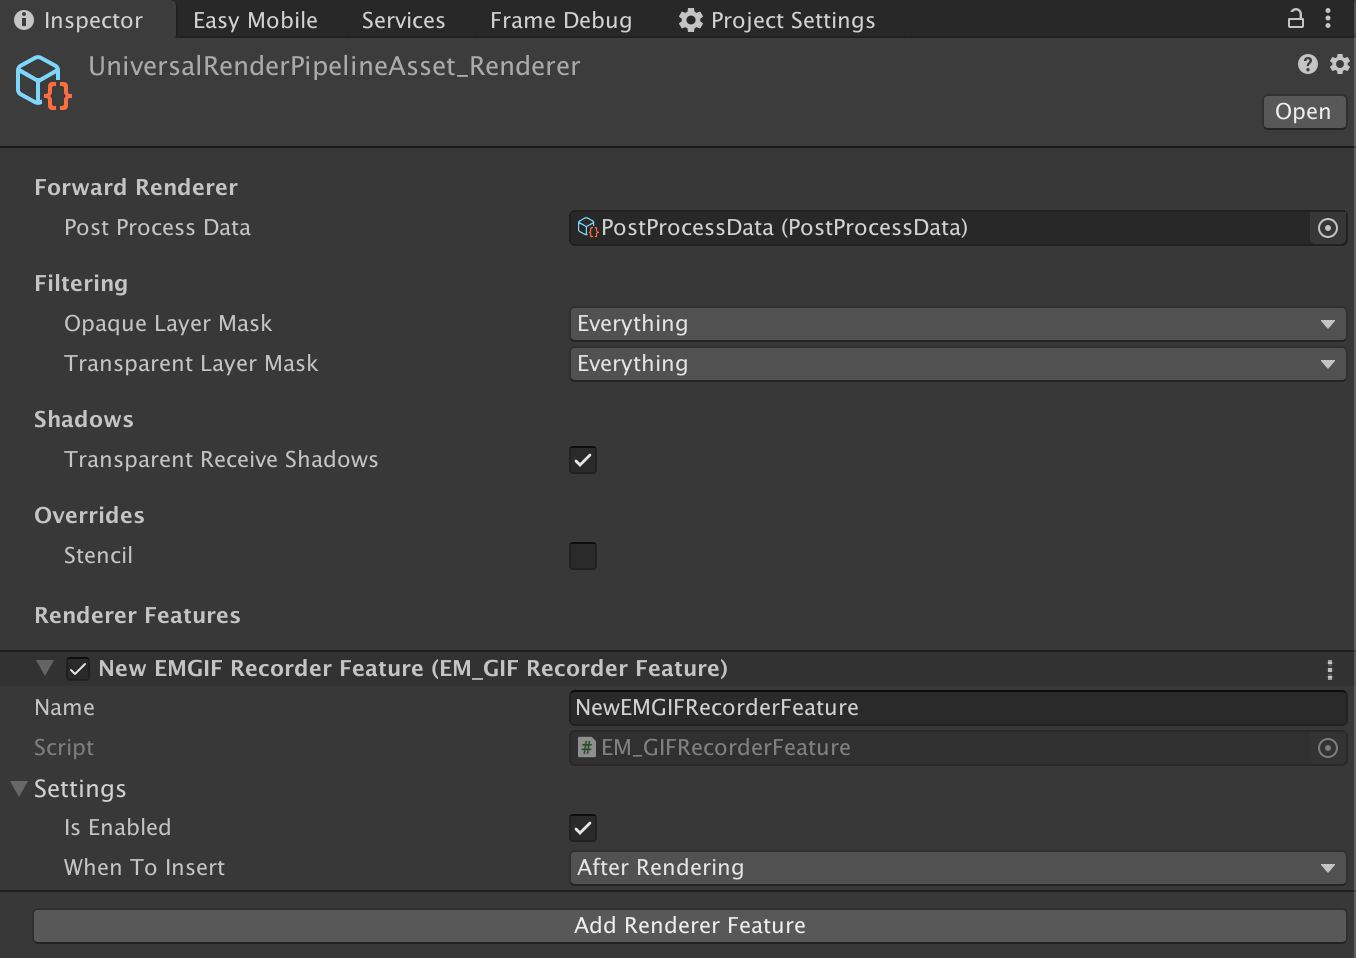
In ProjectSettings/Graphics, you can find the current ScriptableRenderPipeline Asset. In your ScriptableRenderPipeline Asset, you can find the default ScriptableRenderData Asset (the one marked as default, or the only one in the list). Open the default ScriptableRenderData Asset in the inspector, then add a new custom render feature by clicking the Add Renderer Feature button. Choose EM_GIF Recorder Feature from the drop-down list.