Advertising: Settings | Setup FairBid
Importing FairBid Plugin
To show ads from FairBid you need to import the [FairBid plugin for Unity]. In the FAIRBID section, click the Download FairBid Plugin button to open the download page.

Follow the instructions provided by FairBid to download and import its plugin as well as other required 3rd-party plugins. Also go through the Integration Notes section below to avoid problems that may occur during the integration of 3rd-party networks.
If you haven't already, follow FairBid's Integration Guide to setup the 3rd-party networks to use with mediation.
Configuring FairBid
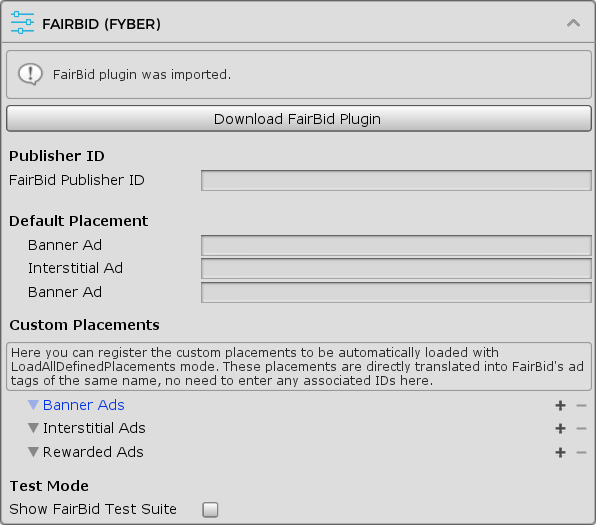
After importing FairBid plugin, the FAIRBID section will be updated as below.

Publisher ID
Here you can enter the required publisher ID to the FairBid Publisher ID field. This ID can be found in the Account Details page in the FairBid dashboard.
Placements
An Easy Mobile's ad placement will be directly translated into a FairBid's ad tag that is same to the placement name in runtime. Therefore if you want to specify a tag when showing a FairBid ad, simply show the ad with an ad placement whose name is the tag you want to use. There's no need to declare any ad IDs to be associated with the placements.
Test Mode
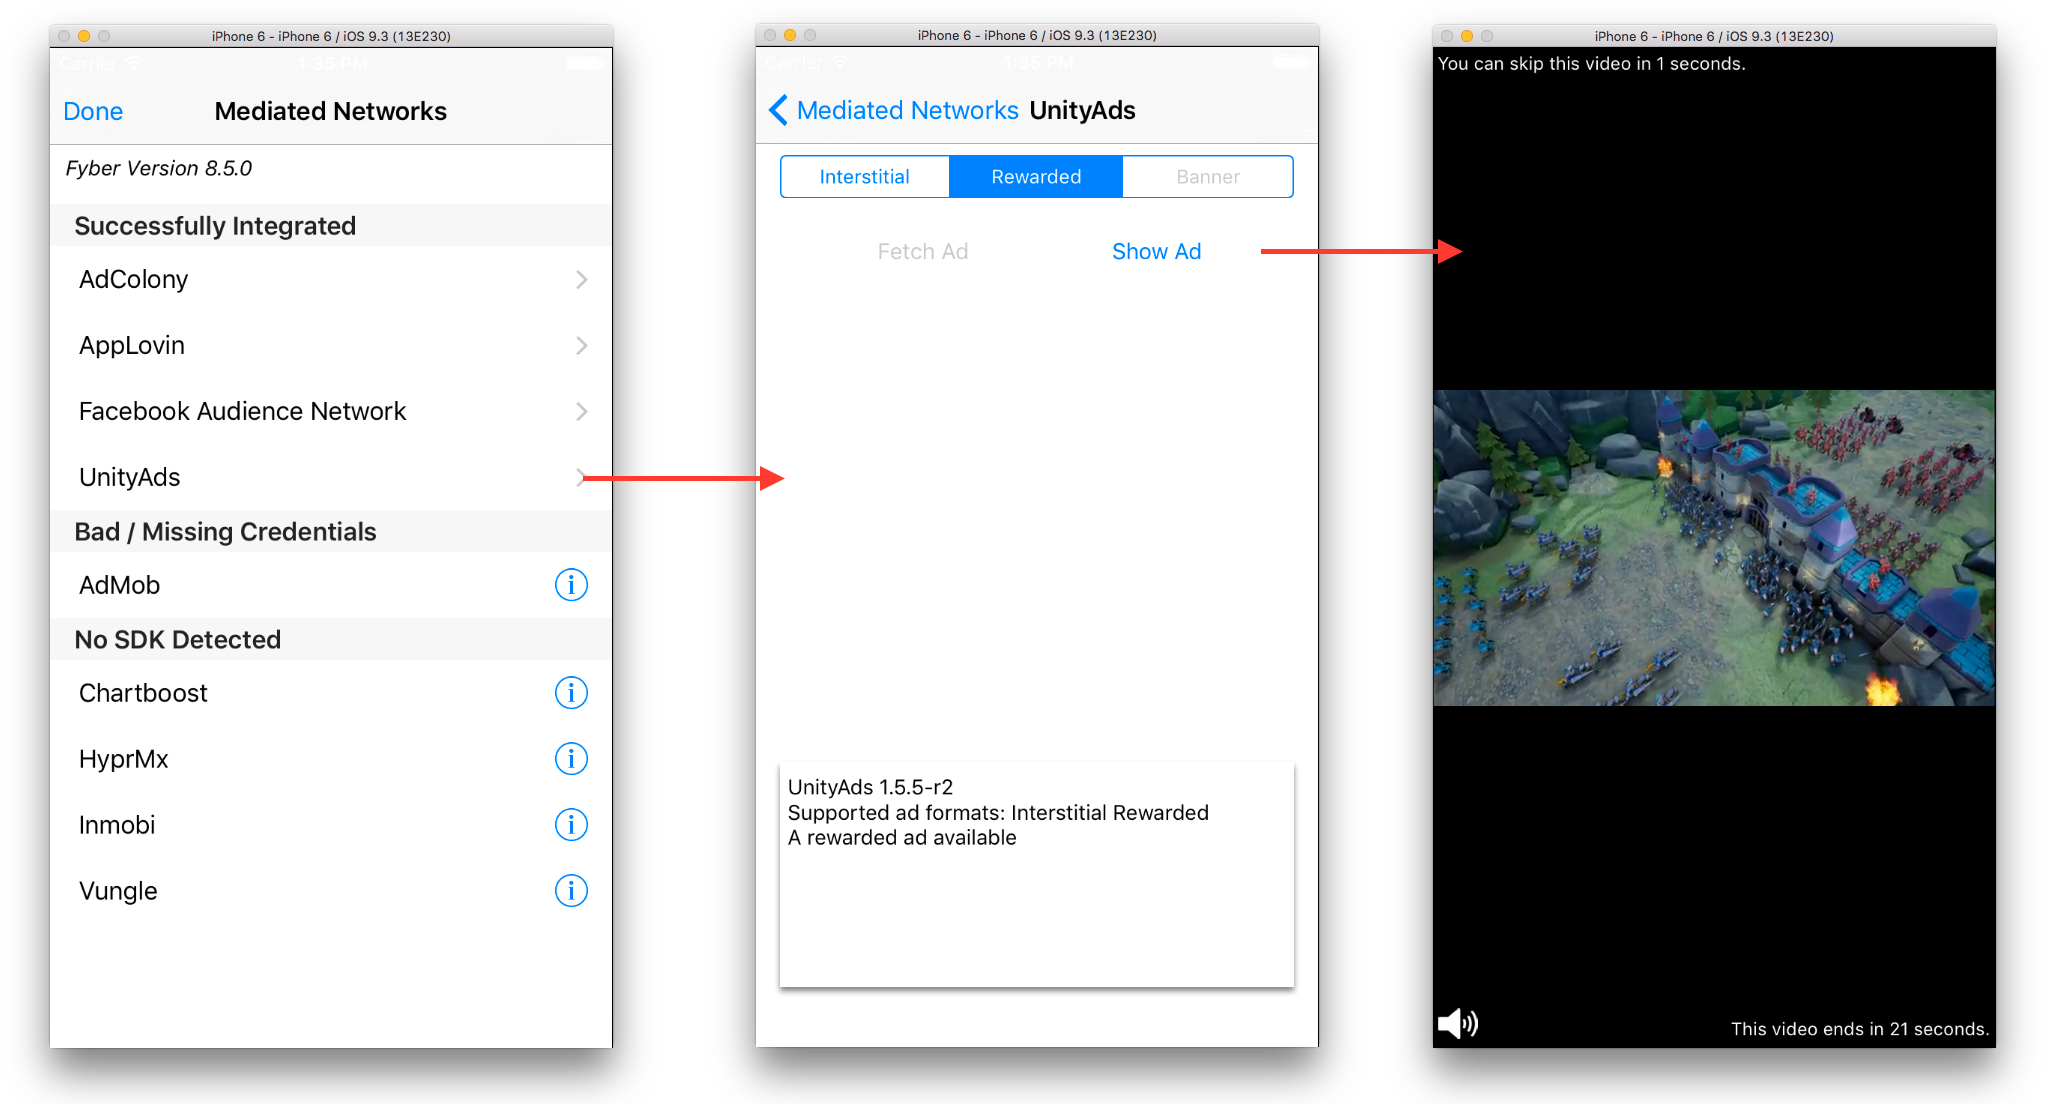
The FairBid plugin comes with a convenient Test Suite that you can use to test the operation of each mediation network. To use this Test Suite, simply check the Show FairBid Test Suite option in the Test Mode section.
Below is the Test Suite interface on iOS (it's similar on Android).

Mediation Notes
This section discusses some notes that you should take when using FairBid mediation with various other networks.
If you use FairBid's mediation feature with other networks (AdColony, AdMob, Chartboost, etc.), you should not import the standalone-plugins of those networks, to avoid potential conflicts. Instead, import their corresponding adapter packages provided at the FairBid download page.
Facebook Audience Network (Android-specific)
The Facebook Audience Network package contains an android-support-v4.jar _file under Assets/Plugins/Android folder. If you project already contains a support-v4-xx.x.x.aar file under that same folder, feel free to remove (or exclude it when importing) the jar file or it will cause the "Unable to convert dex..." error when building due to duplicate libraries.
AppLovin (Android-specific)
As instructed in the FairBid documentation, you need to add the AppLovin SDK key to its AndroidManifest.xml file located at Assets/Plugins/Android/AppLovin folder. Simply add the following line inside the <application> tag in the manifest, replacing YOUR_SDK_KEY with your actual AppLovin SDK key.
<meta-data android:name="applovin.sdk.key" android:value="YOUR_SDK_KEY"/>
This manifest also includes the READ_PHONE_STATE permission, which requires your app to have a privacy policy when uploaded to Google Play. This permission is not mandatory to run the AppLovin SDK, therefore you can safely remove it if you are not ready to provide the required privacy policy. To remove the permission, simply delete the corresponding line from the manifest or comment it out as below.
<!-- Exclude the READ_PHONE_STATE permission because it requires a privacy policy -->
<!-- <uses-permission android:name="android.permission.READ_PHONE_STATE" /> -->
Building Notes
Use the Unity Editor 2018 LTS or later. Building projects using Unity version lower than 2018 may encounter some unwanted problems when loading banner ads.